


Professional Home Gym Installation Advice: 2026 Guide
Table of Contents
- How to Build a Home Gym in a Small Garage
- Home Gym Flooring Installation Tips for Heavy Equipment
- Gym Equipment Assembly Services Cost: DIY vs. Hiring Out
- The Tools and Equipment You Need Before Installation Day
- Step-by-Step Home Gym Installation, From Delivery to First Rep
- Safety, Permits, and Common Mistakes to Avoid
- Frequently Asked Questions
Last Updated: September 16, 2026
How to Build a Home Gym in a Small Garage
Building a functional home gym in a small garage starts with measurement, not shopping. This guide from Perfected Health Co. covers the professional home gym installation advice that separates a setup you'll use daily from one that collects dust. Most people buy equipment first, then discover it doesn't fit, doesn't clear the door, or can't handle the load. The fix is simple: measure twice, plan zones, then order.
Measure the Footprint Before You Buy
Grab a tape measure and record four numbers for every wall: total length, total width, ceiling height, and the width of your garage door opening. Then subtract clearance. A power rack needs roughly 60 centimeters of working space on each side for plate loading.
Write down the swing arc of any door that opens into the space. A Smith machine placed too close to a side door becomes unusable the moment someone walks in.
Map Zones for Lifting, Cardio, and Recovery
Divide the floor into three zones before anything arrives: a lifting platform, a cardio corner, and a recovery area. Lifting equipment goes against the wall with the most clearance. Cardio gear, like a rower or bike, sits near the door where airflow is best.
Recovery tools belong in the quietest corner. A cold plunge or sauna works best away from the clanging of dropped weights, and it needs a level, drainable surface.

Sketch the layout on graph paper at scale. This takes twenty minutes and prevents the "it doesn't fit" moment on delivery day.
Home Gym Flooring Installation Tips for Heavy Equipment
Flooring is the one thing you cannot easily change later, so get it right the first time. Home gym flooring installation tips all point to the same principle: match the material to the load and the surface underneath. Rubber is the default for a reason, but thickness matters more than color.
Match Flooring to the Load
Standard 8-millimeter rubber rolls handle bodyweight work and light dumbbells. Once you add a rack, a Smith machine, or a loaded barbell, you need 15 to 20 millimeters of dense rubber, or interlocking tiles rated for dropping weight.
For a dedicated deadlift or Olympic lifting area, build a platform: two layers of plywood topped with rubber stall mats. This spreads the impact and protects the concrete slab underneath.
- Cardio and bodyweight zone: 8 mm rubber roll
- Free weights and racks: 15-20 mm dense rubber
- Olympic lifting: plywood platform with rubber overlay
Level the Surface Before Anything Goes Down
Concrete garage floors slope toward the door for drainage, often by a noticeable amount over a few meters. A rack that sits on a slope will rock, and a rocking rack is a safety hazard under load.
Check the floor with a long level or a straightedge. If you find a slope, use self-leveling compound in the equipment zone, or shim the feet with solid, non-compressible material. Never use stacked washers or cardboard.
Gym Equipment Assembly Services Cost: DIY vs. Hiring Out
Gym equipment assembly services cost varies widely by machine, and the honest answer is that most home lifters can assemble their own gear with a second person and a few hours. Hiring out makes sense for complex multi-station machines or if you have physical limitations.
Here's the trade-off in plain terms:
| Approach | Best For | Time Investment | Main Risk |
|---|---|---|---|
| Full DIY | Racks, benches, plate-loaded machines | A few hours, two people | Missed torque specs |
| Partial DIY | Cardio machines, cable systems | Half a day | Cable routing errors |
| Professional assembly | Multi-station and Smith machines | Scheduled visit | Scheduling delays |
The real cost of hiring out is not just the labor fee. It's the wait. Many assembly services book out days or weeks, and you're paying for a task that a friend and a Saturday can handle on simpler equipment.
For anything with cables, pulleys, or a weight stack, read the manual before committing to DIY. If the diagram makes you uneasy, hire out. A misrouted cable can damage the machine or fail under load.
The Tools and Equipment You Need Before Installation Day
Gather everything before the truck arrives, because a missing tool stalls the whole job. The kit is short and cheap.
SaunaLife Model G6 Pre-Assembled →
- Tape measure and a long spirit level
- Socket set covering the bolt sizes in your manual
- Torque wrench for anchor and frame bolts
- Rubber mallet for seating joints
- Utility knife for trimming flooring
- Furniture dolly or appliance straps for moving heavy frames
- Work gloves and safety glasses
Two people minimum for anything over 45 kilograms. A Smith machine frame is a two-person lift, no exceptions.
Step-by-Step Home Gym Installation, From Delivery to First Rep
Professional home gym installation follows a fixed order: floor first, then position, then anchor, then test. Rushing any step means redoing the one before it. Here is the sequence that works.
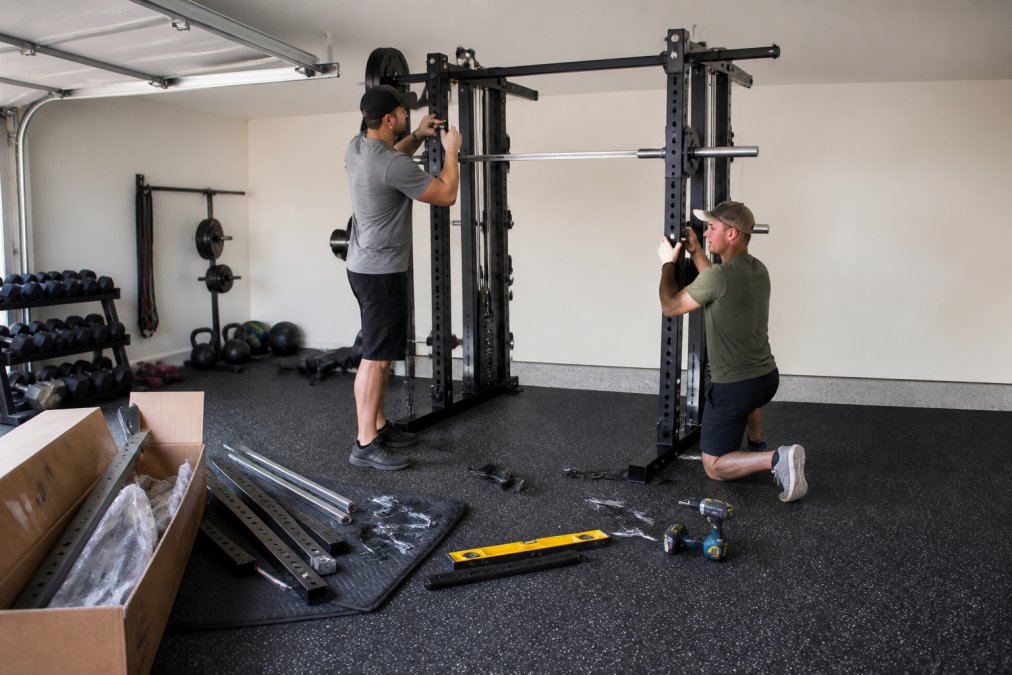
Position the Machine and Check Clearances
Set the frame in its final spot before tightening anything. Check three clearances: door swing, ceiling height at the highest point, and plate-loading space on both sides.
Walk the full range of motion on every moving part. A cable that binds or a bar that grazes a wall needs repositioning now, not after anchoring.
Anchor, Torque, and Test Under Load
Anchor racks and Smith machines to the floor or wall if the manual specifies it. Use the recommended fasteners for concrete, and never substitute a shorter bolt.
Torque every frame bolt to the specification in the manual, then re-check after the first week of use. New equipment settles, and bolts that felt tight on day one loosen.
Test under load before your first real workout. Load the bar or carriage progressively, watch for rocking or flex, and confirm the safeties catch at the correct height.
Safety, Permits, and Common Mistakes to Avoid
Most home gym problems trace back to three avoidable errors. First, skipping the anchor on a rack that needs one. Second, ignoring ceiling clearance for pull-up bars or overhead presses. Third, overloading a floor that wasn't built for it.
On permits, the rules vary by state and municipality. Structural changes, added electrical circuits, or a permanent outdoor structure like a sauna typically require a permit, while placing freestanding equipment usually does not. Check with your local building department before you build anything permanent. The U.S. Consumer Product Safety Commission home fitness guidance is a useful starting point for equipment safety, and the OSHA guidance on safe lifting and materials handling explains the manual-handling limits worth respecting when moving heavy frames.
For equipment standards, the ASTM International standards for fitness equipment cover design and testing requirements that reputable manufacturers follow.
A common mistake is buying recovery equipment last. A cold plunge or sauna is not an upsell; it's the part of the setup that keeps you training. Pairing a hot and cold contrast routine with your lifting zone supports the recovery that consistent progress depends on.

Building a home gym that actually gets used comes down to planning the space before you buy, flooring that matches the load, and anchoring everything to spec. Perfected Health Co. carries the high-performance equipment and recovery tools to make it happen, from durable Smith machines to cold plunges and outdoor saunas, all backed by free shipping on most orders and a 30-day return policy.
Frequently Asked Questions
Do I need professional help to install home gym equipment?
It depends on the machine. A Smith machine or cable tower typically needs two people for the frame and a torque wrench for the bolts, which most handy owners can handle in a weekend. Professional home gym installation makes more sense for multi-station rigs, anything requiring anchoring into concrete, or if you want the warranty paperwork signed off by an installer. If you are unsure, ask the retailer whether assembly is included or available as an add-on.
What are the safety requirements for home gym flooring?
The main requirements are load capacity and slip resistance. Rubber tiles or rolled rubber at 8 mm or thicker handle dropped plates and protect concrete from cracking under a rack. The surface must be flat, dry, and free of debris before installation, and you should leave a small expansion gap at walls. If the floor is above a living space, add a plywood sublayer to spread point loads from a loaded barbell or machine base.
How much does gym equipment assembly services cost?
Assembly services usually run $150 to $400 per machine, with multi-station rigs and Smith machines at the higher end because of weight and bolt count. Some retailers include assembly in the delivery fee, and some charge per hour instead of per unit. Compare that against your own time and the risk of a mis-torqued frame: if a pro charges $250 and you would need two weekends plus a rental truck, hiring out is often the cheaper call.
How do I know if a machine will fit in my garage before it ships?
Measure the machine's full footprint plus 3 feet of clearance on each side you load from, and check the ceiling height against the tallest position of the frame or bar path. Write the numbers down and compare them to your garage before ordering. For example, a Smith machine needs vertical clearance for the bar at the top of its travel, not just the frame height. If the numbers are close, mark the footprint on the floor with tape and walk through a set before you buy.