


How to Design the Ultimate Home Training Space
Table of Contents
- Start With a Clear Training Goal and a Realistic Budget
- Home Gym Flooring Requirements: What Your Subfloor Needs to Handle
- The Best Home Gym Layout for Small Spaces and Garage Conversions
- Essential Equipment for Serious Lifters: What Earns Its Footprint
- Home Gym Lighting and Ventilation Tips for Long Sessions
- Electrical, Connectivity, and Acoustic Dampening Most Builds Skip
- Safety, Structural Load, and Modular Scaling Over Time
- Frequently Asked Questions
Last Updated: September 12, 2026
Start With a Clear Training Goal and a Realistic Budget
Designing a home training space starts with one decision most people skip: what your home training space is actually for. A powerlifter needs a squat rack and loadable plates; a busy professional needs a cardio machine and a functional trainer. Those are different rooms, and building the wrong one wastes money and square footage.

Lifters often buy equipment before defining the goal, then rearrange their space multiple times.
Write down three things before you spend anything:
- Your primary training modality (barbell strength, functional training, cardio, or a mix)
- How many people will train in the space at once
- Your realistic ceiling on total spend, including flooring and electrical work
That last one matters more than most guides admit. Flooring, lighting, and ventilation routinely eat a meaningful share of a build budget before a single weight plate arrives.
Home Gym Flooring Requirements: What Your Subfloor Needs to Handle
Home gym flooring requirements come down to three variables: the load you're dropping, the surface underneath, and how much bounce you can tolerate. Concrete handles weight but destroys joints and equipment. Bare foam is comfortable but collapses under a loaded barbell.

Rubber, Foam, or Horse Stall Mats: Matching the Surface to the Lift
Rubber flooring is the default for strength training because it absorbs impact from dropped weights, resists sliding under a squat rack, and survives years of abuse. Thickness is the deciding spec. Thicker tiles handle heavier drops; thinner rolls suit cardio and bodyweight work.
Foam tiles work for flexibility zones and floor work. They compress under load, so they belong nowhere near a deadlift platform.
Horse stall mats are the budget favorite: dense, cheap per square foot, and nearly indestructible. The catch is weight and smell, a single 4x6 mat can weigh over 45 kilograms, and new mats off-gas for weeks.
| Surface | Best For | Watch Out For |
|---|---|---|
| Rubber tiles | Strength training, dropped weights | Higher upfront cost |
| Foam tiles | Stretching, floor work | Compresses under load |
| Horse stall mats | Budget builds, deadlift platforms | Heavy, strong rubber odor |
The Best Home Gym Layout for Small Spaces and Garage Conversions
The best home gym layout for small spaces follows one rule: separate zones by function, not convenience. A zone-based layout keeps a barbell from rolling into a treadmill and keeps intensity high because you're never rearranging equipment mid-session.
Zone-Based Layouts That Keep Lifting and Cardio From Colliding
Divide the room into four bands: a strength zone for the rack and bench, a cardio corner, a flexibility zone for mats and mobility work, and storage along the walls.
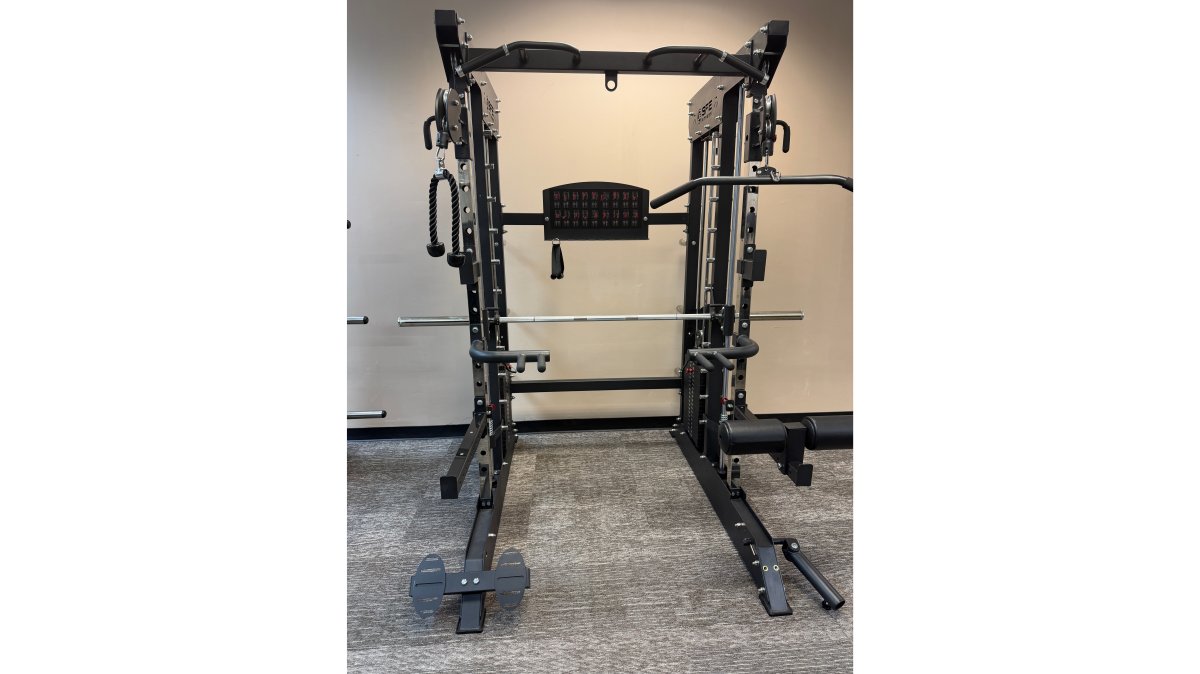
Equipment footprint drives everything. A power rack with a Smith machine and functional trainer occupies one station that would otherwise require three separate machines, which is why all-in-one units dominate small-space builds. Leave walkway clearance on at least two sides of any rack so you can load plates safely.
Essential Equipment for Serious Lifters: What Earns Its Footprint
Essential equipment for serious lifters is the short list covering 90% of programming: a rack, a bench, a bar, plates, dumbbells, and one cardio machine. Everything else is optional until you outgrow it.
The American College of Sports Medicine physical activity guidelines recommend both aerobic and resistance training weekly, which is a practical argument for buying one cardio piece rather than skipping it entirely.
Here's what earns permanent floor space:
- A power rack or all-in-one trainer. Non-negotiable for solo heavy lifting. Safety bars let you fail a rep without a spotter.
- An adjustable bench. Flat, incline, and decline coverage in one footprint.
- A cardio machine. A treadmill or rower covers conditioning without a commute.
- Dumbbells and a barbell set. Resistance training variety, minimal space.
Perfected Health Co. carries a Commercial Squat Rack with Safety Bars, J-Hooks and Weight Storage that solves storage by hanging plates on the rack itself. For a single-station build, the All-in-One Home Gym Power Rack with Smith Machine and Functional Trainer combines three machines into one footprint, the highest-use purchase in a small garage.

Home Gym Lighting and Ventilation Tips for Long Sessions
Home gym lighting and ventilation tips matter more than the aesthetic crowd admits. Overhead lighting that throws shadows across a platform makes heavy sets harder to judge, and a sealed garage becomes a sauna by the second superset.
Lighting plan:
- Overhead LED panels at 4000-5000K for even, shadow-free illumination
- Ambient lighting on a separate switch for warm-up and mobility work
- Gym mirrors mounted to reflect light and let you check bar path and squat depth
Ventilation plan:
- A ceiling or wall exhaust fan sized to the room's volume
- A floor fan aimed across the training zone, not at your face
- Dehumidification if the space is below grade
Electrical, Connectivity, and Acoustic Dampening Most Builds Skip
Three systems separate a professional-grade training room from a converted garage: power, signal, and sound. Most guides skip all three, which is why so many home gyms trip breakers, drop Wi-Fi mid-set, and generate noise complaints from the floor above.
Electrical Load Planning Before You Buy Anything That Plugs In
A treadmill or incline trainer can pull more current than a space heater, continuously, for 30 to 60 minutes (energy.gov). That sustained draw trips breakers, not the peak. Before placing cardio equipment, find the circuit serving the room and confirm what else is on it.
A practical sequence:
- Locate the breaker panel and identify which circuit feeds the training space.
- Check the amperage rating on that breaker. Older homes often run 15-amp circuits in garages and basements; modern builds typically use 20-amp.
- Add up the continuous draw of everything you plan to run at once. A treadmill, a fan, and a television on the same 15-amp circuit is a common overload pattern.
- If the math is tight, have a licensed electrician run a dedicated circuit rather than relying on power strips.
Outlet placement matters as much as capacity. Put receptacles on at least two walls so you never run an extension cord across a lifting platform, where it becomes a trip hazard under a loaded bar. For a cold plunge or sauna, plan a dedicated circuit and usually a GFCI-protected outlet, water and electricity in the same room is not a place to improvise.
Connectivity for Smart Equipment and Streaming Coaching
Smart trainers, heart-rate straps, streaming coaching platforms, and wall-mounted screens all depend on a stable signal, and garages are notoriously the worst Wi-Fi zone in the house. Concrete walls, metal garage doors, and distance from the router degrade signal.
A few things that reliably help:
- A mesh Wi-Fi node placed in or near the training space, rather than relying on the router at the far end of the house.
- A hardwired Ethernet drop if you plan to mount a screen or run a stationary smart trainer that benefits from low latency.
- A dedicated charging station, a wall-mounted power strip or a small shelf with outlets, so tablets, watches, and headphones are not competing for a single wall outlet.
If you mount a television or a screen, plan the cable path before you mount it. Running power and signal behind the wall looks clean and costs far less to do once than to retrofit.
Acoustic Dampening: The Step Almost Everyone Skips
Dropped weights don't just make noise in the room, they transmit impact energy through the slab and into the structure. That's why a deadlift at 6 a.m. can sound like a demolition crew two floors up, even when the lifter hears only a dull thud.
There are two distinct problems to solve, and they need different fixes:
- Airborne noise, the sound traveling through the air, like a fan, a treadmill motor, or music. Soft surfaces help: rubber flooring, acoustic panels on shared walls, and heavy curtains.
- Impact noise, the thud transmitted through the floor structure. This is the harder problem, and it is solved with mass and decoupling, not with soft surfaces alone.
For impact noise, the effective approach is layered:
- Start with dense rubber flooring or horse stall mats as the base layer.
- Add a second layer of high-density rubber or a mass-loaded vinyl barrier under the platform itself.
- Build a dedicated deadlift platform with a plywood core sandwiched between rubber layers, this spreads the impact across a larger area instead of concentrating it under the plates.
A common pattern combines a rubber base layer with a plywood-and-rubber platform in the strength zone, leaving cardio and mobility zones on simpler flooring, concentrating cost and mass where impact actually happens.
If you share a wall with a bedroom or home office, acoustic panels reduce airborne noise but do little for impact transmission. The floor is where the real work happens.
Safety, Structural Load, and Modular Scaling Over Time
Safety and structural load capacity decide what your floor can actually hold, and almost no home gym guide addresses them. A loaded rack, a lifter, and a stack of plates concentrate hundreds of pounds into a small area, whether that's fine depends on what's underneath.
How Much Load Is Actually on Your Floor
A useful way to think about it is total concentrated weight at the rack or platform:
- A power rack alone typically weighs 200 to 400 pounds.
- A loaded barbell with plates can add 300 to 500 pounds or more.
- The lifter adds another 150 to 250 pounds.
- A plate tree or weight storage on the rack can add several hundred more pounds.
That's a realistic concentrated load of 800 to 1,500 pounds in a few square feet. On a concrete slab on grade this is a non-issue, slabs are designed for far more. On an upper floor or older wood-framed structure, it deserves real attention.
A few practical rules:
- Slab-on-grade (garage, basement, ground-floor room): Almost always fine for a home gym. The main concern is moisture, not load.
- Upper floor or wood-framed structure: Verify before you load. A structural engineer or a contractor can confirm whether the joists and span can handle the concentrated load, and whether a platform needs to spread it across multiple joists.
- Platforms help. A deadlift platform spreads impact and load across a larger area, which reduces point loading on any single joist.
- Distribute, do not concentrate. Placing a rack against a load-bearing wall or over a beam is better than centering it in the middle of a span.
OSHA's materials handling guidance on safe lifting loads is written for workplaces, but the same load-distribution logic applies to a home platform: the goal is to spread force across as much structure as possible.
Ceiling Height and Overhead Clearance
Ceiling height is the constraint that eliminates equipment, not the other way around. A standard power rack needs roughly 8 feet of clearance for overhead pressing and pull-ups. Most garages clear this. Most basements do not.
Measure before you buy. If your ceiling is low, a squat stand or wall-mounted rack may fit where a full power rack will not, and a fixed-upright bench press may beat a rack you cannot press in.
Modular Scaling: Build the Room in Phases
Most guides present a single ideal setup. A more useful approach is modular, build in phases so each purchase earns its place before the next arrives.
Phase 1, Foundation. Flooring, platform, and the rack or all-in-one trainer. This is the non-negotiable core. Everything else is optional until this works.
Phase 2, Primary training. A bench, a bar, plates, and one cardio machine. This covers the majority of programming for most lifters.
Phase 3, Accessories and variety. Dumbbells, a functional trainer attachment, bands, and mobility tools. Add these once you have outgrown the core.
Phase 4, Recovery and specialty. Cold plunge, sauna, or specialty equipment. These are legitimate additions once the training space works, not substitutes for it.
A 58-year-old lifter focused on longevity doesn't need the same room as a 28-year-old powerlifter, but both benefit from the same foundation. The modular approach lets you start with the core and scale toward whichever direction your training goes, rather than buying a room you can't grow into.
Frequently Asked Questions
What is the 3-3-3 rule in a home gym?
It is a spacing guideline, not a training program: keep 3 feet of clear walkway between zones, 3 feet of open floor on the working side of any rack or bench, and 3 feet above your head for overhead presses and pull-ups. Measure your ceiling height before buying a rack, since many power racks need at least 8 feet of clearance and most garage ceilings sit at 8 to 9 feet.
What flooring works best under heavy-duty home gym equipment?
Rubber is the default for a reason. Interlocking rubber tiles or 4 by 6 foot rubber mats handle dropped weight plates, protect concrete from cracking, and add grip underfoot. Foam tiles are cheaper and fine for bodyweight work, but they compress under a squat rack and slide during heavy pulls. If you deadlift, add a plywood platform over the rubber so the bar lands on a flat, stable surface.
How do I improve lighting and airflow in a garage gym?
Swap single-bulb fixtures for 4-foot LED shop lights mounted overhead and slightly forward of your rack so you are not lifting in your own shadow. For airflow, a sealed garage needs active ventilation: a wall-mounted exhaust fan plus a box fan aimed across the room keeps air moving. In summer, a portable evaporative cooler or ductless mini-split makes long sessions bearable.
How much space do I actually need for a serious home training space?
A functional setup fits in about 10 by 12 feet. That allows a power rack or all-in-one trainer, a bench, and a cardio machine with walkway space between them. All-in-one units that combine a Smith machine, functional trainer, and rack in one footprint are the most efficient choice for a one-car garage, since they replace three separate machines without adding floor area.
Do I need cold plunge or recovery equipment in a home gym?
It depends on your goals, not your age. If you lift heavy four or more days a week, cold exposure and mobility tools can help manage soreness and keep training consistent. If you are purely focused on strength and recover well already, you can skip it. Recovery equipment is an add-on, not a requirement, and it can wait until the lifting setup is finished.
How do I know equipment will hold up to heavy lifting?
Look at the weight rating and the frame material. Commercial-grade racks and all-in-one trainers typically use 11- or 12-gauge steel with welded joints rather than bolted tubular frames. Check the stated weight capacity of the weight stacks or bar hooks and confirm it exceeds your working loads by a comfortable margin. Plate-loaded machines with integrated storage also keep loose weight off the floor.